How to Make Your Own Couch and DIY Sofa Bed
How to Make Your Own Couch
When my mother-in-law came to visit back in October, my husband and I spent a really busy couple of weeks getting our apartment together. We had moved into a new 2-bedroom plus loft in August and pretty much ignored getting our place in order for the first two months while we were busy working.
Then, time started running out and setting up our apartment became REALLY important. I mean, I couldn't have my mother-in-law stay in an apartment that looked and felt as if we just graduated college. We had barely any furniture and were eating on TV trays every night. It was pitiful.
So, we started a checklist and worked our way through it. One big project was figuring out where guests would sleep when they came to visit? The living room and loft do not provide enough privacy so they were out. And our second bedroom was already filled with desks, computers, and guitars so a real bed or even a futon would not fit.
Then it hit me...we crafted our own dining table, so why not try to make our own DIY couch that could double as a guest bed? I headed to Ana White's blog, but since the only couch was more of a storage couch, we took the basic idea and expanded on it.
And here's how our couch turned out...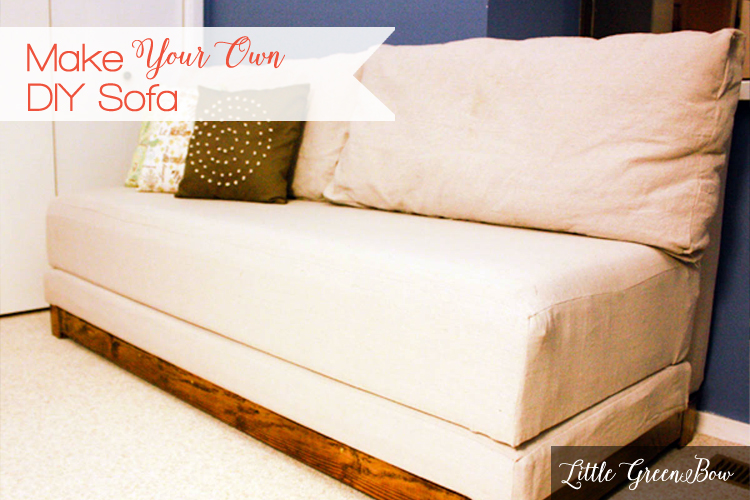
I LOVE IT! The color is neutral and it's actually really comfy to sleep on. It's even Mother-in-Law approved!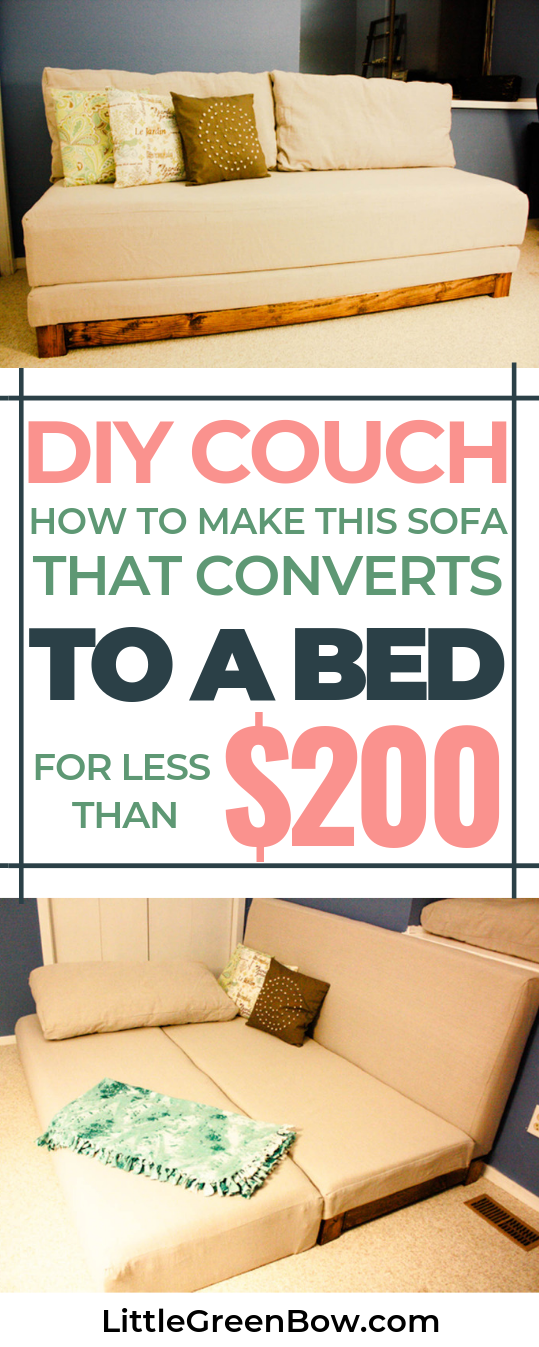 Here are the supplies we used to complete this project and some photos of it coming together.
(Update: the detailed plans are now available!)
 Supplies:
* 6 - 2x4 boards
* 2 - 2x6 boards
* 2 - 2x2 boards
* 24" of 4x4 post
* 2 sheets of plywood
* 2 yards of batting
* 2 yards of burlap
* 2 paint drop cloths (9'x12')
* sand paper
* stain
* screws
* staple gun
* mitre saw
* circular saw
* foam mattress
* 2 foam mattress toppers
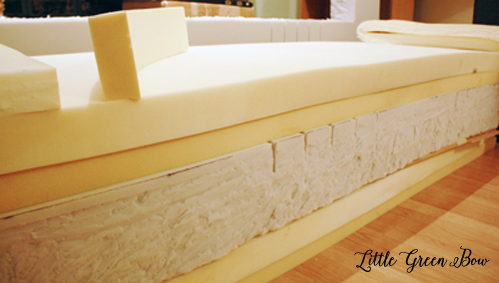
The is a picture of the foam used for the seats. It's one foam hospital mattress cut to size and 2 foam queen mattress toppers cut in half.
This is the frame of the couch starting to come together. 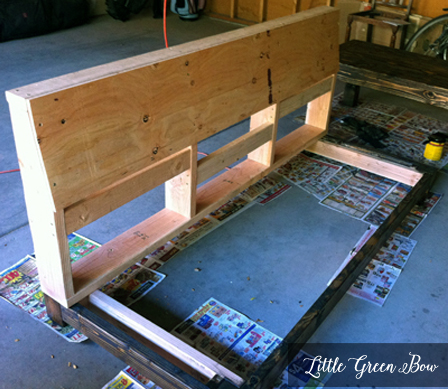
Burlap was attached to the back before the batting and fabric
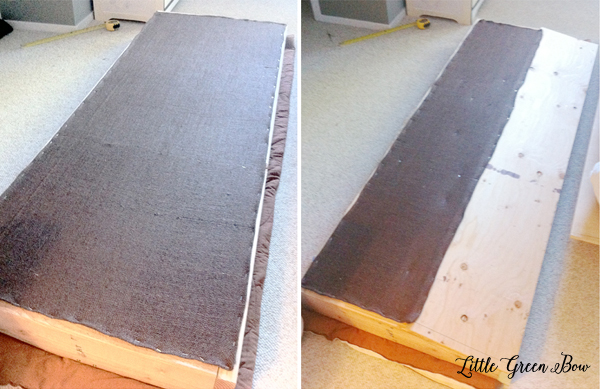 The batting was attached to the back frame.
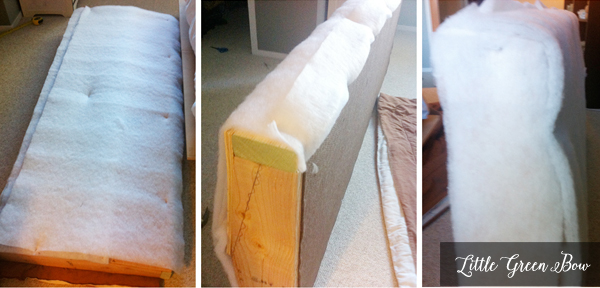
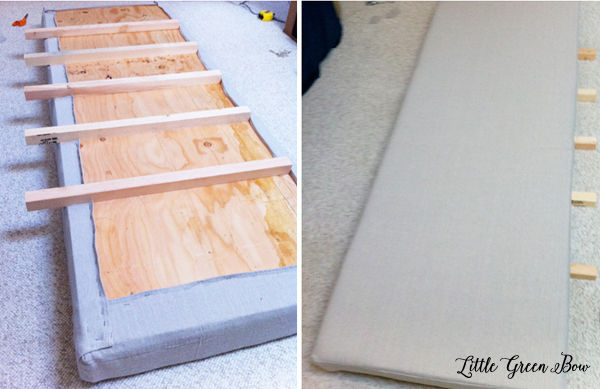
The bottom seat gets upholstered with supports on the underside
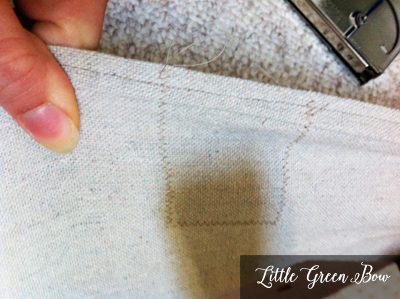
I sewed around where the supports would be and cut out the inside square before stapling to the bottom
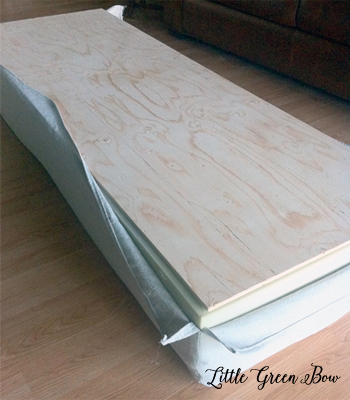
The top seat getting upholstered
Check back next week when I have the plans up. Feel free to subscribe so you don't miss it. (Update: The plans are up! Check them out here.)
Or download a free PDF with the detailed instructions including supplies, cut list, directions, and step-by-step plan images.

I'm linking at:
WhipperBerry
Bubbly Nature Creations
Tatertots & Jello
I can't stop crafting
Be Different, Act Normal
Sew Can Do
Skip to my Lou
Today's Creative Craft
Bowl Full of Lemons
Homework
Home Stories A2Z
Lamb Around
The Shabby Nest
Night Owl Crafting
Ask Anna
Decorating Insanity

